How Do You Make Pottery? Step-By-Step
Pottery has been a beloved art form for centuries, allowing individuals to create functional and decorative objects with their own hands. From delicate porcelain to rustic earthenware, pottery-making offers a creative outlet for those who appreciate the beauty of handmade crafts. If you’re interested in learning how to make pottery, this step-by-step guide will walk you through the process, from gathering materials to adding the finishing touches.
I. Introduction
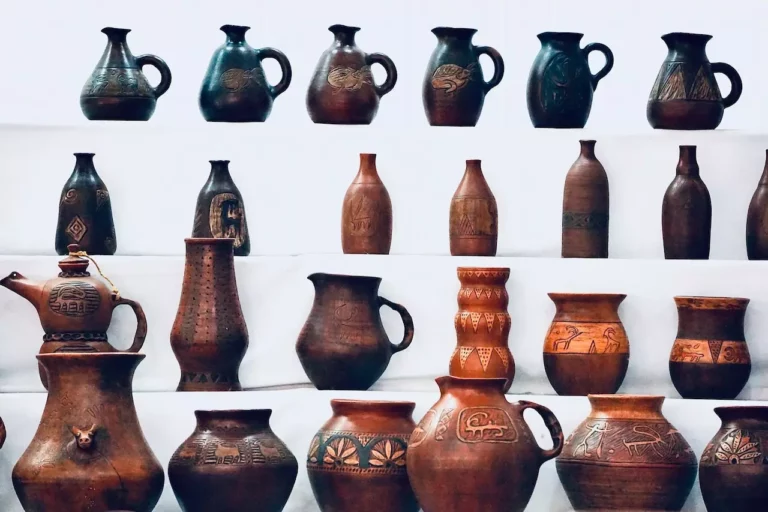
Pottery has a rich history dating back thousands of years, serving various purposes throughout different cultures. From ancient vessels used for storage to intricate ceramic art pieces adorning palaces, pottery has always played a significant role in human civilization. Today, pottery-making continues to captivate enthusiasts who are eager to explore their artistic talents and create unique, one-of-a-kind pieces.

II. Gathering Materials and Tools
Before you start making pottery, it’s essential to gather the necessary materials and tools. Here are the key items you’ll need:
A. Clay selection
The first step is to choose the right type of clay for your project. There are various clay options available, including earthenware, stoneware, and porcelain. Each type has its own characteristics and firing temperatures, so it’s important to select the clay that best suits your desired outcome.
B. Pottery tools
Equipping yourself with the right tools will make the pottery-making process more efficient. Some essential tools include a potter’s wheel, a set of throwing tools, clay carving tools, a kiln for firing, and various brushes for applying glazes and decorations.
III. Preparing the Clay
Once you have your clay, it’s time to prepare it for shaping. This involves two primary steps: wedging and kneading.
A. Wedging the clay
Wedging is the process of removing air bubbles and ensuring uniform consistency throughout the clay. It helps to prevent cracking and other issues during the pottery-making process. To wedge the clay, cut it into manageable sections and repeatedly press and fold it to expel air pockets.
B. Adding water and kneading
After wedging, you may need to add water to the clay if it’s too dry. Sprinkle water over the clay and knead it to achieve a workable consistency. Kneading also helps to further remove any remaining air bubbles and ensures the clay is ready for shaping.
IV. Shaping the Pottery
With your prepared clay, you’re now ready to shape it into the desired form. There are two main techniques for shaping pottery: throwing on a wheel and hand-building.
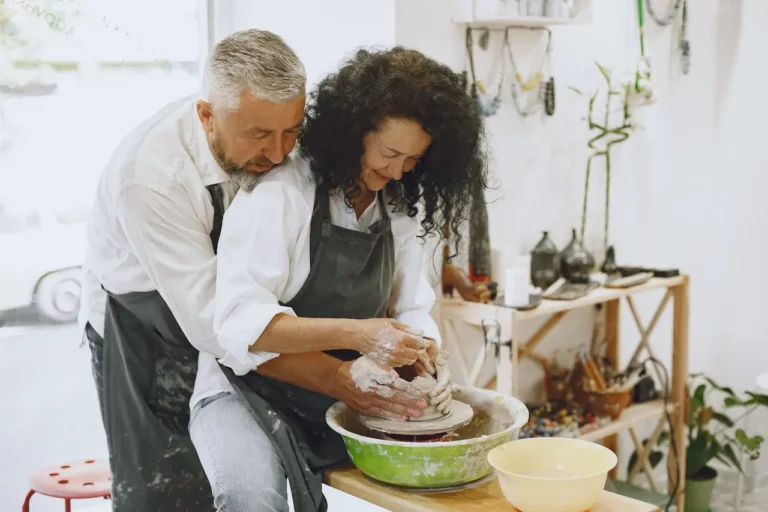
A. Centering the clay on the wheel
If you’re using a potter’s wheel, start by centering the clay on the wheelhead. Apply gentle pressure to keep the clay centered as the wheel spins. This step is crucial for achieving balance and symmetry in your pottery.
B. Throwing or hand-building the form
Once the clay is centered, you can begin shaping it. For throwing on a wheel, use your hands and throwing tools to shape the clay while the wheel spins. If you prefer hand-building, use techniques like coiling, slab-building, or pinching to create your desired form. Experiment with different techniques to achieve the desired shape and texture.
V. Trimming and Smoothing
After shaping the pottery, it’s important to refine the form by trimming and smoothing the surface.
A. Trimming excess clay
Trimming involves removing excess clay from the bottom of the pottery form to refine its shape and create a smooth foot or base. Use a pottery tool called a trimming tool to carefully remove the excess clay while the piece is still on the wheel.
B. Smoothing the surface
To achieve a smooth and even surface, use a sponge or your hands to gently smooth out any imperfections or rough edges. Pay attention to details and ensure that the overall surface is pleasing to the touch.
VI. Drying and Bisque Firing
Once you’re satisfied with the shape and smoothness of your pottery, it’s time to let it dry and undergo the first firing, known as bisque firing.
A. Air-drying the pottery
Place your pottery in a well-ventilated area to allow it to dry naturally. This process may take several days or even weeks, depending on the thickness of the clay and the ambient humidity. Avoid rushing the drying process to prevent cracking or warping.
B. Firing the pottery in a kiln
After the pottery has completely dried, it’s ready for the bisque firing. Load your pottery into a kiln and gradually raise the temperature according to the specifications of the clay you’re using. Bisque firing helps remove any remaining moisture from the clay and prepares it for glazing.
VII. Glazing
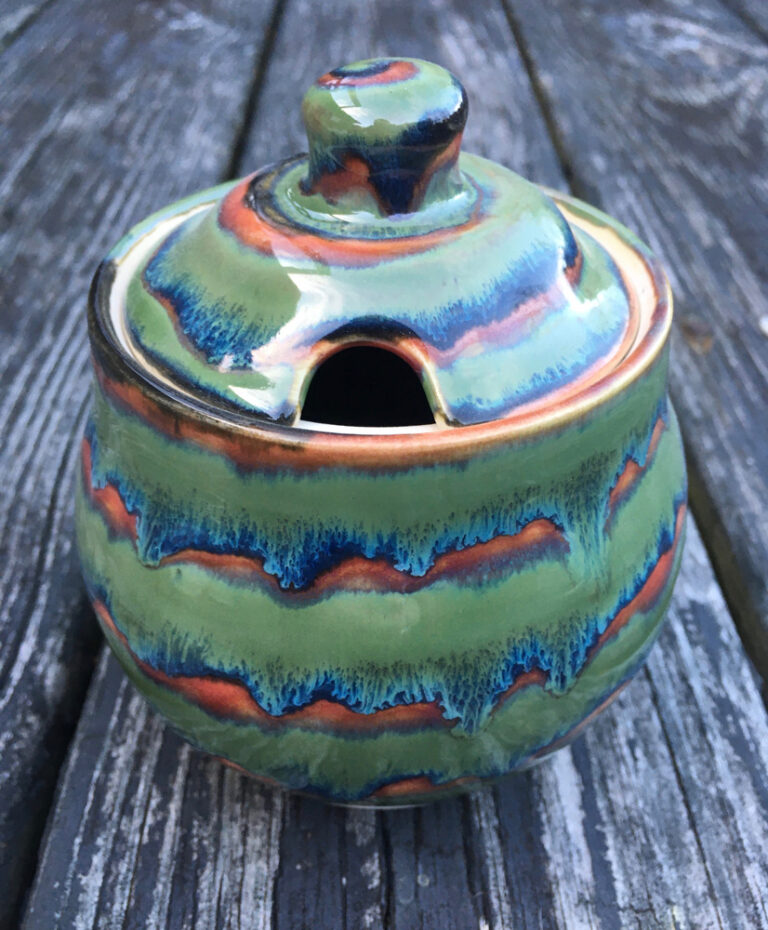
Glazing adds color, texture, and a protective layer to your pottery. There are numerous glazes and decorating techniques to choose from, allowing you to unleash your creativity and personalize your pieces.
A. Applying glazes
Dip, brush, or pour the glaze onto your bisque-fired pottery, ensuring even coverage. Take care to avoid glazing the bottom of the piece if you plan to place it directly on a surface during firing.
B. Decorating techniques
You can enhance your pottery further by incorporating various decorating techniques. This includes carving designs, applying underglazes for intricate patterns, or using wax resist to create contrast and texture. Experiment with different techniques to achieve the desired visual effect.
VIII. Glaze Firing
After glazing, it’s time for the final firing, known as glaze firing or high firing. This firing process vitrifies the glaze, transforming it into a glossy and durable surface.
A. Loading the kiln
Carefully load your glazed pottery into the kiln, ensuring that pieces are adequately spaced to allow for even heat distribution. Consider the size, shape, and firing requirements of each piece when arranging them inside the kiln.
B. Firing the glazed pottery
Follow the specific firing instructions for the glaze you’ve used, including the recommended temperature and firing duration. It’s essential to closely monitor the kiln during firing to ensure that the pottery reaches the desired temperature without any issues.
IX. Finishing Touches
After the glaze firing, your pottery is almost complete. However, there are a few finishing touches you can add to make your pieces truly stand out.
A. Sanding and polishing
Use fine-grit sandpaper to smooth any rough spots or edges on the glazed pottery. This step helps achieve a professional finish and enhances the tactile quality of the piece. After sanding, wipe away any dust particles and give the pottery a final polish.
B. Adding final details
If desired, you can add additional details to your pottery, such as attaching handles, knobs, or other decorative elements. Ensure that any additional attachments are securely fastened and complement the overall design.
X. FAQs
What types of clay are commonly used for pottery?
Common types of clay used for pottery include earthenware, stoneware, and porcelain. Each clay type has its own characteristics and firing temperature ranges.
Can I make pottery without a potter’s wheel?
Absolutely! Hand-building techniques like coiling, slab-building, and pinching allow you to create pottery without a potter’s wheel. These methods offer unique possibilities for creativity and craftsmanship.
How long does it take for pottery to dry?
The drying time for pottery can vary depending on factors like clay thickness and ambient humidity. It can take several days to weeks for pottery to fully dry before it can be fired.
Is glaze firing necessary for pottery?
Glaze firing is not mandatory, but it adds color, texture, and a protective layer to the pottery. Glazes also enhance the visual appeal of the pieces and make them food-safe and water-resistant.
Can I personalize my pottery with unique designs?
Absolutely! Pottery offers endless possibilities for personalization. You can add unique designs through carving, painting, or incorporating different decorating techniques like underglazes or wax resist.
XI. Conclusion
Making pottery is a rewarding and creative process that allows you to transform raw clay into functional and beautiful objects. From gathering the materials to adding the finishing touches, each step in pottery-making offers an opportunity for artistic expression. Embrace the journey, experiment with different techniques, and let your imagination guide you as you create unique pieces of pottery.