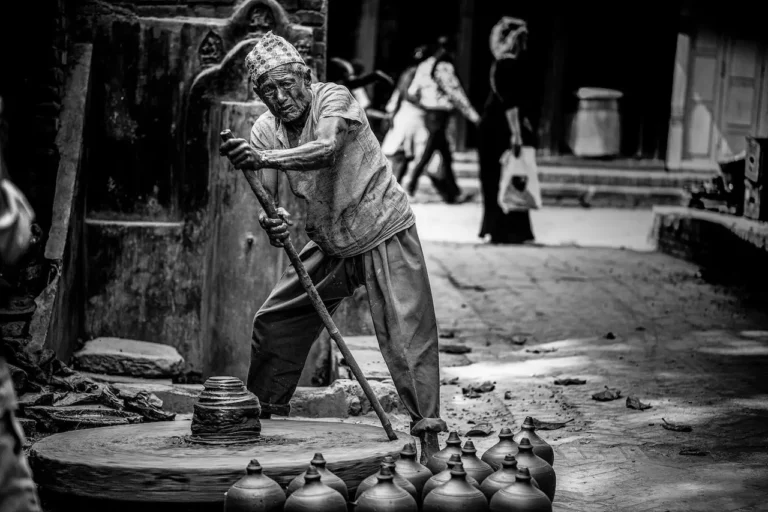
How to Do Pottery at Home Step-by-Step In-Detail
Pottery is an ancient art form that allows you to create unique and functional objects using clay. Whether you’re a beginner or an experienced artist, learning how to do pottery at home can be a rewarding and fulfilling experience.
In this article, we will guide you through the step-by-step process of creating pottery, from preparing your workspace to adding the final touches to your masterpiece. So, let’s dive in and unleash your creativity!
Introduction
Pottery is not only a creative outlet but also a therapeutic activity that allows you to relax and unwind while making something beautiful with your hands. By following a few simple steps, you can transform a lump of clay into a work of art that reflects your personal style and imagination.
Benefits of Pottery
Before we delve into the details of creating pottery, let’s explore some of the benefits it offers:
- Creativity and Self-Expression: Pottery provides a unique opportunity to express your creativity and showcase your personal style through the art of shaping clay.
- Stress Relief: Working with clay can be a calming and meditative process, helping to reduce stress and promote mindfulness.
- Therapeutic Benefits: Pottery has been known to improve hand-eye coordination, fine motor skills, and cognitive abilities.
- Sense of Accomplishment: Completing a pottery project and seeing the finished result can bring a sense of fulfillment and achievement.
Required Materials and Tools
To get started with pottery, you will need the following materials and tools:
- Clay: Choose a clay type suitable for your desired pottery techniques. Options include earthenware, stoneware, and porcelain.
- Pottery Wheel or Slab Roller: A pottery wheel is used for wheel throwing, while a slab roller is used for hand-building techniques.
- Pottery Tools: Essential tools include a pottery knife, clay sculpting tools, a rib, a wire cutter, a sponge, and a kiln.
- Glazes and Brushes: Glazes add color and texture to your pottery. Invest in a variety of glazes and brushes for different effects.
- Kiln: A kiln is used for firing your pottery at high temperatures, making it durable and water-resistant.
Preparing the Workspace
Before diving into pottery, it’s crucial to set up a dedicated workspace that allows you to work comfortably and efficiently. Follow these steps to prepare your pottery workspace:
- Choose a Well-Ventilated Area: Pottery involves working with clay and glazes, which may produce dust and fumes. Ensure your workspace has proper ventilation to maintain a healthy environment.
- Cover Surfaces: Protect your work surface with a plastic sheet or canvas to prevent clay and glaze stains.
- Organize Tools: Keep your pottery tools within reach and organize them in a way that suits your workflow.
- Set Up a Clay Recycling Station: Designate an area for clay recycling, as clay scraps can be reused to minimize waste.
- Consider Lighting: Adequate lighting is essential for accurately shaping and detailing your pottery.
Choosing the Right Clay
Selecting the right clay is crucial for successful pottery. The type of clay you choose depends on your desired outcomes and the techniques you plan to use. Here are some common clay types:
- Earthenware Clay: Earthenware clay is suitable for beginners and is fired at lower temperatures. It is known for its warm colors and porous nature.
- Stoneware Clay: Stoneware clay is durable, making it suitable for functional pottery. It is fired at higher temperatures and has a wide range of colors and textures.
- Porcelain Clay: Porcelain clay is smooth, delicate, and translucent when fired. It requires precise handling and is ideal for creating delicate pottery pieces.
Basic Pottery Techniques
There are two primary pottery techniques: hand-building and wheel throwing. Let’s explore each technique in detail:
Hand-building Techniques
Hand-building allows you to shape clay using your hands and basic tools. Here are some common hand-building techniques:
- Pinch Pot Technique: Start with a small ball of clay, make a hollow with your thumb, and gradually shape it by pinching and smoothing.
- Coil Technique: Roll out long coils of clay and layer them to build the desired shape. Use your fingers or a tool to blend the coils together.
- Slab Technique: Roll out a flat slab of clay and cut it into shapes. Assemble the shapes to create boxes, plates, or other objects.
Wheel Throwing Techniques
Wheel throwing involves using a pottery wheel to shape clay. Here’s a step-by-step breakdown of the wheel throwing process:
- Centering: Place a lump of clay on the center of the wheel head and use water and gentle pressure to center the clay.
- Opening: Create a hole in the center of the clay by applying pressure with your thumbs and gradually widening the opening.
- Pulling and Shaping: Pull the walls of the clay upwards to create the desired shape of your pot. Use various techniques to shape the pot, such as trimming and adding handles.
- Finishing: Smooth and refine the surface of your pot using tools like a rib, sponge, and your fingers.
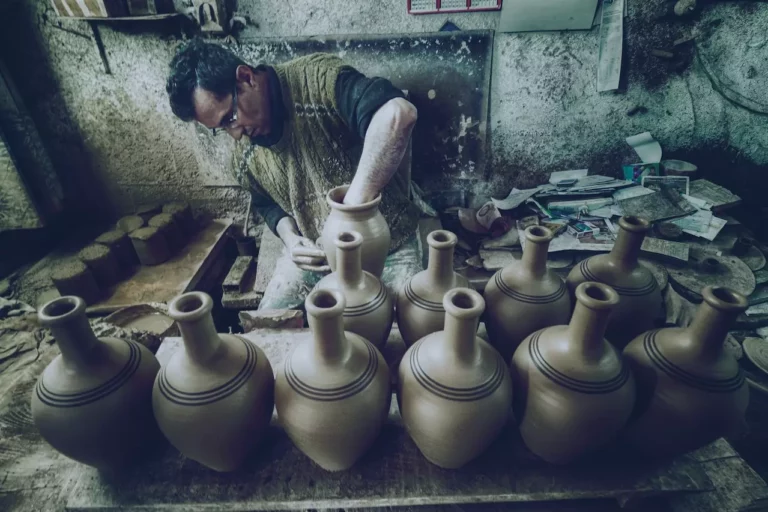
Creating Your First Pot
Now that you have a solid understanding of the basic techniques, it’s time to create your first pot. Follow these steps:
- Prepare the Clay: Knead and wedge the clay to remove air bubbles and ensure its consistency.
- Choose a Technique: Decide whether you want to use hand-building or wheel throwing for your first pot.
- Start Shaping: Apply the chosen technique to shape the clay, using your hands or a pottery wheel.
- Refine and Detail: Smooth the surface, add texture, or carve designs into your pot to personalize it.
- Let it Dry: Allow your pot to dry completely before moving on to the next steps.
Trimming and Finishing
After your pot has dried, it’s time to refine its shape and add finishing touches:
- Trimming: Use a pottery tool or a trimming tool to remove excess clay from the bottom of your pot, creating a foot or a smooth base.
- Adding Details: Carve decorative patterns, handles, or other elements to enhance the aesthetics of your pot.
- Smooth Edges: Gently sand any rough edges using sandpaper or a sponge to achieve a polished finish.
Drying and Bisque Firing
Once your pot is fully shaped and finished, it needs to be dried and bisque fired to remove moisture and prepare it for glazing:
- Air Drying: Place your pottery in a dry area and allow it to air dry slowly. This process can take several days to a couple of weeks, depending on the thickness of the clay.
- Bisque Firing: Place your dried pottery in a kiln and fire it at a low temperature, typically between 1700°F and 1900°F (927°C and 1038°C). Bisque firing strengthens the clay and makes it ready for glazing.
Glazing and Final Firing
Glazing adds color, texture, and a protective layer to your pottery. Follow these steps to glaze your bisque-fired pottery:
- Choose Glazes: Select the glazes that match your desired colors and effects. Consider experimenting with layering different glazes for unique results.
- Apply Glazes: Use a brush or dip your pottery into the glaze, ensuring even coverage. Allow the glaze to dry between coats if multiple layers are desired.
- Final Firing: Place your glazed pottery back in the kiln and fire it at the recommended temperature for the glaze you’re using. The firing temperature depends on the specific glaze, so refer to the manufacturer’s instructions.
Decorating and Personalizing Your Pottery
Once your pottery is fired and cooled, you can unleash your creativity by adding additional decorative elements:
- Underglaze Decoration: Use underglaze colors to paint intricate designs or patterns on your pottery.
- Carving and Incising: Carve or incise into the glazed surface to create texture or highlight specific areas.
- Adding Accents: Attach additional clay pieces, beads, or other materials to enhance the overall look of your pottery.
Caring for Your Pottery
To ensure the longevity of your pottery, follow these care tips:
- Avoid Extreme Temperature Changes: Rapid temperature changes can cause pottery to crack or break. Avoid placing hot pottery directly into cold water or vice versa.
- Handle with Care: Pottery can be fragile, so handle it gently and avoid dropping or mishandling it.
- Hand Wash Preferred: While some pottery may be dishwasher-safe, it’s generally recommended to hand wash your pottery with mild soap and water.
- Avoid Abrasive Cleaners: Use non-abrasive materials to clean your pottery and avoid harsh chemicals that may damage the glaze or clay.
- Store Properly: When storing your pottery, separate pieces with soft materials to prevent scratching or chipping.
Troubleshooting Common Pottery Issues
Pottery can present challenges along the way. Here are solutions to common pottery issues:
- Cracking: Cracks can occur due to uneven drying, improper clay consistency, or inadequate compression. Ensure even drying and proper clay preparation.
- Warping: Warping can happen during drying or firing. Make sure your pottery is supported and has even thickness throughout.
- Glaze Imperfections: Glaze imperfections may result from inconsistent application or improper firing. Follow glaze application instructions and fire at the recommended temperature.
Pottery Safety Tips
While pottery is a rewarding activity, it’s essential to prioritize safety. Keep the following tips in mind:
- Use Protective Gear: Wear an apron, gloves, and a dust mask to protect yourself from clay dust and glaze materials.
- Ventilate the Area: Ensure proper ventilation to minimize exposure to clay dust and fumes.
- Handle Kiln Safely: Follow kiln safety guidelines, including proper handling of hot objects and adherence to firing schedules.
- Proper Tool Use: Use pottery tools as intended and be cautious while handling sharp objects.
- Be Mindful of Heat: Pottery can become hot during firing and handling. Allow it to cool before touching or moving it.
FAQs
Can I do pottery without a kiln?
Yes, air-dry clays or polymer clays are alternatives that do not require firing in a kiln.

Where can I buy pottery supplies?
Pottery supplies can be purchased from local craft stores, online retailers, or pottery supply shops.
How long does it take to learn pottery?
The learning curve for pottery varies for each individual. It takes time and practice to become proficient, but with dedication, you can master the basics relatively quickly.
Can I reuse clay scraps?
Yes, clay scraps can be recycled by rehydrating and wedging them to remove air bubbles before reuse.
Can I glaze pottery without a pottery wheel?
Absolutely! Glazes can be applied to hand-built pottery using brushes, dipping, or pouring techniques.
Conclusion
Congratulations! You have learned the step-by-step process of doing pottery at home. From preparing your workspace to creating, firing, and decorating your pottery, each stage allows you to explore your creativity and create unique pieces. Remember to embrace the joy of experimentation and enjoy the journey of creating beautiful pottery.